Learning how to draw a tarantula can be a rewarding experience, opening a world of artistic exploration. These fascinating creatures, with their intricate details and unique textures, offer a fantastic subject for artists of all skill levels. This guide provides a comprehensive, step-by-step approach to drawing a realistic tarantula, covering everything from basic materials to advanced shading techniques. Whether you’re a seasoned artist or a complete beginner, this tutorial will equip you with the knowledge and skills to bring this impressive arachnid to life on paper.
Materials You’ll Need to Draw a Tarantula
Before you begin, gather your essential drawing supplies. Having the right materials can significantly impact the quality and enjoyment of your drawing. These tools will allow you to create the foundation for your tarantula drawing with precision and ease. Remember, the quality of your materials often reflects in the final artwork. A well-equipped artist is a confident artist, ready to tackle any challenge that comes their way. Here’s a list of the necessary materials to get you started.
Pencils
A set of pencils with varying hardness is crucial for achieving different effects. Start with a range from 2H (for light sketching) to 4B (for darker shading). The ‘H’ pencils are harder and create lighter lines, perfect for initial sketches and outlining. The ‘B’ pencils are softer, producing darker, richer tones that are excellent for shading and adding depth. Experimenting with these different pencils will allow you to control the tonal values and achieve a realistic look in your tarantula drawing. The choice of pencil hardness depends heavily on the level of details and the desired effect of the drawing.
Eraser

A good quality eraser is essential for correcting mistakes and creating highlights. Consider both a kneaded eraser (moldable and versatile for lifting graphite) and a standard eraser (for precise corrections). Kneaded erasers are particularly useful because they can be shaped to erase small areas, making them ideal for fine details. Standard erasers are great for cleaning up larger areas and removing any unwanted marks. It’s also good practice to have an eraser shield to protect areas you want to preserve while erasing next to them.
Paper
Choose drawing paper that is suitable for pencil work. Paper with a smooth to medium texture is ideal. Avoid paper that is too rough, as it can make it difficult to achieve smooth shading, or too smooth, as the graphite might not adhere well. A sketchbook or individual drawing sheets will work perfectly. Look for paper with a weight of at least 90 lb/130 gsm to prevent the paper from buckling under the pressure of your pencils and erasers. The right paper sets the stage for a quality drawing, ensuring the pencil glides effortlessly and the details stand out.
Optional Supplies
Optional supplies can enhance your drawing experience. These include a blending stump or tortillon (for blending and softening lines), a ruler (for measuring proportions), and a reference photo of a tarantula. The blending stump helps create smooth transitions between tones, while the ruler can assist in ensuring accuracy. Having a detailed reference photo is invaluable for understanding the tarantula’s anatomy, helping you capture the correct proportions and details. These extras are not strictly necessary but can greatly elevate your drawing skills.
Step-by-Step Guide Draw a Tarantula
Now, let’s begin the drawing process. The following steps will guide you through creating a realistic tarantula, from the initial sketch to adding the final details. Following these steps methodically will allow you to build a well-proportioned and detailed drawing. Remember, patience and observation are key to successful art. Don’t be afraid to take your time and enjoy the process. Each step contributes to the final masterpiece, making it satisfying to draw a tarantula. Start by gathering your materials and setting up your workspace for optimal comfort.
Step 1 Sketch the Body
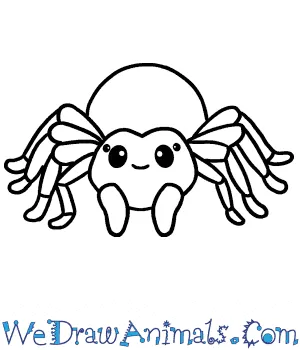
Begin by lightly sketching the basic shapes of the tarantula’s body. Start with the cephalothorax (the head and thorax combined), which is generally oval or roundish. Next, sketch the abdomen, which is typically larger and more rounded than the cephalothorax. Use light pencil strokes initially, so you can easily erase and correct your lines as needed. Pay attention to the proportions of the body parts relative to each other. This initial sketch serves as the foundation for the rest of your drawing, so ensure you capture the correct basic shapes. Remember to maintain an even balance in proportions to maintain realism.
Step 2 Add the Legs
Sketch in the legs, noting their position and shape. Tarantulas have eight legs, each segmented. Start by lightly drawing the basic lines of each leg, paying attention to their angles and how they connect to the cephalothorax. Observe the natural curve and bend of the legs. Add the leg segments with more defined lines. This will require careful observation of the reference image. Consider the length and thickness of each leg and how they extend outward from the body. Accurate leg placement and form contribute significantly to the overall realism of the drawing. Be mindful of the symmetry and balance of the legs.
Step 3 Details and Texture

Once the basic shapes are in place, start adding details to create texture. Tarantulas have a hairy texture. Use short, light strokes to simulate the fine hairs covering their bodies and legs. Vary the direction and density of these strokes to create a sense of depth and realism. Observe the patterns and textures of the tarantula in your reference image, paying attention to how light and shadow affect these details. Don’t be afraid to experiment with different pencil pressures to achieve varied textures. This step will bring your tarantula drawing to life by adding the essential details that make it unique.
Step 4 Refining the Drawing
Refine the drawing by correcting any inaccuracies in the proportions or lines. Use your eraser to lighten or remove unwanted lines. Check the overall balance and symmetry of the tarantula. Smooth out any rough edges and refine the shapes of the body parts and legs. At this stage, you’re essentially making the drawing look polished and complete. Refine the drawing details to align with your reference, ensuring the tarantula is proportional and accurately represented. This will improve the final look of your drawing and help give it a more realistic feel. This stage makes sure the drawing lines match the final representation.
Step 5 Shading and Adding Depth
Begin adding shading to create depth and volume. Identify the light source and shade the areas of the tarantula that are in shadow. Use different pencil grades to vary the darkness of your shading. Blend the shading with a blending stump or tortillon to create smooth transitions. Focus on the areas of shadow and highlight to create a sense of three-dimensionality. Adding shadows under the legs, around the body segments, and on the body itself is crucial. This will give the drawing a realistic look. This final stage is about making the tarantula pop off the page with the use of light and shadow.
Tips for Improving Your Tarantula Drawing

Enhance your skills with these helpful tips. Drawing takes practice, so don’t be discouraged if your first attempt isn’t perfect. Every attempt helps you learn and improve. Here’s how to get the most out of your drawing sessions and speed up your journey to become a tarantula art master.
Observe Real Tarantulas
If possible, observe real tarantulas. Visit a zoo, a pet store, or research high-quality images and videos online. Pay close attention to their body structure, hair, and the way they move. This firsthand observation will give you a deeper understanding of their anatomy and behavior, which can significantly enhance the realism of your drawings. Take the time to study tarantulas in detail, noticing their unique characteristics. Consider how the light interacts with their bodies. This practice is the most effective way to improve accuracy and attention to detail.
Practice Regularly
Consistent practice is key to improving your drawing skills. Make time to draw regularly, even if it’s just for a few minutes each day. Practice drawing tarantulas repeatedly to build your muscle memory and improve your technique. This repetition helps you to master the different elements of your drawing. Focus on different aspects each time, such as proportions, shading, or textures. Over time, you’ll notice improvements in your accuracy, speed, and overall artistic ability. Make drawing a part of your routine to develop your artistic talent.
Experiment with Different Techniques

Experiment with various drawing techniques to find what works best for you. Try different shading methods, such as hatching, cross-hatching, and stippling. These techniques can help you achieve a wide range of textures and effects. Don’t be afraid to explore different pencil grades and paper types. This experimentation is a crucial part of artistic growth. The best way to learn is to push the boundaries of your skills. Trying new things opens up new possibilities. This exploration is crucial to discovering your unique artistic style.
Common Mistakes to Avoid
Be aware of these common pitfalls to avoid them. Drawing can be challenging, and it’s easy to make mistakes, especially when you’re learning. Recognizing these mistakes beforehand can help you focus and refine your technique to improve your final drawing. Learn from these potential pitfalls, making your learning curve smoother. Recognizing these pitfalls will allow you to advance more quickly.
Incorrect Proportions
One of the most common mistakes is drawing incorrect proportions. The body parts might not be in the right size or relation to each other. Always use references to ensure accurate proportions, and measure the relative sizes of different elements. Consider the size and shape of the cephalothorax, abdomen, and legs. Avoid rushing the sketching phase, and take the time to make sure the proportions are correct before moving on to the next steps. This will ensure your final drawing looks realistic and well-balanced.
Lack of Texture

Another common mistake is a lack of texture. Many beginners fail to capture the unique texture of a tarantula’s hairy body. This can make the drawing look flat and less realistic. To avoid this, use short, light strokes to simulate the hairs. Vary the direction and density of these strokes to add depth and dimension. Pay attention to how light reflects off the tarantula’s body. This will allow you to create the appearance of hair and fur. This can make the drawing look much more realistic.
Over-Shading
Over-shading is another common mistake. It is often seen when artists try to add too much shading too quickly. This can result in a drawing that looks dark and muddy. The key is to build up the shading gradually, layer by layer, and use a light touch. Avoid using too much pressure when shading, and blend the shading to achieve smooth transitions. Always identify your light source. This will make your drawing look more professional. This approach will create more realistic depth without making the image too dark.
Drawing a tarantula is a rewarding experience, combining artistic skill with an appreciation of nature. By following the steps, tips, and avoiding common mistakes in this guide, you’ll be well on your way to drawing a realistic tarantula. Remember to be patient, practice regularly, and enjoy the process. Happy drawing!